


Do you have old baby items lying around? If you have a baby or toddler, chances are YES, there are tons of usable items you’re either holding onto to re-gift to friends, for another child, or just because you haven’t gotten around to sorting through them yet. You may also have items that people insisted were a must-have but you just didn’t get much use out of.
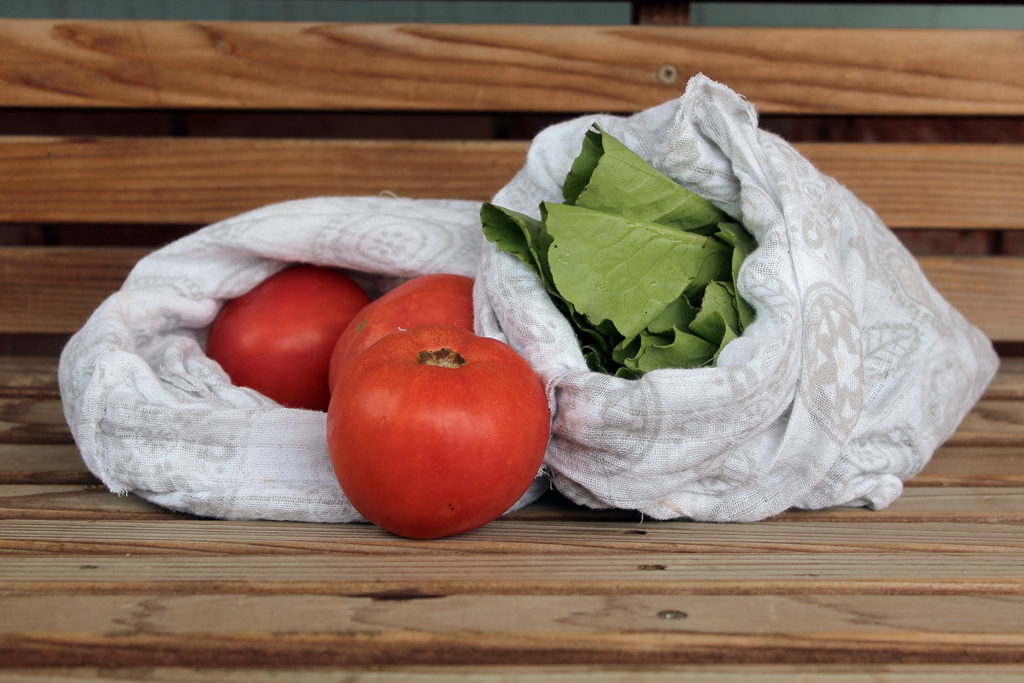
For me that was muslin baby swaddles. I had about eight of them, half of them never used but taken out of the packaging. I thought they were so soft and pretty but hardly ever needed to swaddle our chill baby in the middle of July heat waves. However when I was looking for fabric to make reusable produce bags for our trips to the grocery store or farmer’s market, it struck me that this lightweight breathable (and washable!) fabric would be perfect for the job.
Even better, baby swaddles are just the right size to be cut down into three, four or five bags and are a cinch to sew up using a simple straight stitch. Nothing fancy, just an easy upcycling project that can be completed during naptime.
This is a super simple project that any beginning sewist can complete easily! It’s great for practicing straight lines on an unconventional fabric. Let’s get started!
Step 1: Pick your swaddles and prewash.
Step 2: Fold swaddle in half. It doesn’t matter which way because they are usually square.
Step 3: Decide if you are going to make three, four, or five bags. For four (and five) bags, I first found the midpoint and marked it, and then folded the swaddle in towards the middle to find the quarter line (halfway between middle and edge). This will yield four skinny bags, with the fold being the bottom of the bag. If you want, you can take one or two of these sections and cut them horizontally into two shorter bags that would work better for small items like herbs or limes, garlic etc.

** For three wider bags, use a measuring tape to mark three equal sections along the fold line.
Note: It’s possible there will already be fold lines if your blankets were stored folded in quarters. Many blankets also have a faint gridline in the weave of the fabric that can assist you in cutting a straight line.
Step 4: Cut along the gridline using pinking shears. Pinking shears will help prevent fraying, but if you don’t have them, then fabric scissors work too.

Step 5: With right sides of the fabric together, pin along the side seams. Gauzy fabric may need extra pinning; or if you are comfortable holding the fabric as you sew, just pin the top to make sure the seams match up.

Step 6: Sew the sides using a simple straight stitch and a 5/8” seam allowance. If desired, sew box corners (see picture). You don’t need to sew the bottom of the bag because that’s where the fabric is folded.


Optional: you can sew a drawstring sleeve (fold over and sew, leaving a gap to insert drawstring, such as a shoelace, using a safety pin the guide through the sleeve), or if you think the bag is too tall and narrow, cut the top, fold over and sew a new hem.

Personally I like the long narrow shape because I can use to top of the bag to carry with. Obviously you can make any size bags you like, the point is to reuse this fabric, which I think is perfect for produce as it’s washable and dries rather quickly. You can also do a double seam if you desire but shouldn’t be necessary.
Step 7: Clip an excess fabric, such as on the corners. Turn inside out, and your produce bag is ready to use.

Care: If the bag gets wet you can hang to dry; if dirty, throw in the wash.
That’s it! Enjoy your new upcycled ecofriendly produce bag!
