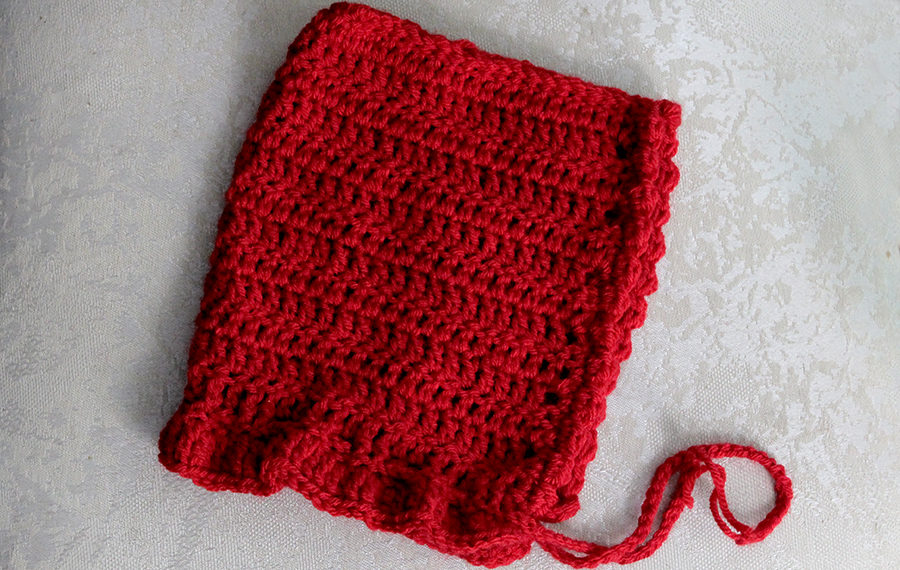
It’s that time of year when temperatures vary wildly from day to day here in southeast Michigan. You don’t always need a sweater but sometimes a warm hat is in order on windy days!

This pattern was inspired by my daughter’s new red shoes and the coming cool fall weather. I thought it would be darling along with the shoes, if only she will keep a hat on her head! It works up quickly in an hour and half with less than a skein of super soft Vanna Choice acrylic, or any other red yarn you like. This is the one of the first patterns I’ve written so feedback is appreciated in the comments or in an email.
I think the textured stitches take this a step above a simple hat or hood and give it that whimsical fairy tale feel. I hope you enjoy it as much as I enjoyed making it!

This pattern is free for personal use only. If you would like to sell items made from this pattern, please contact me at alethafaye@gmail.com
Little Red Hood
Size: 12-24 months
Hook Size: I for Body and H for edging and drawstring
Yarn: 1 ball of Vanna’s Choice in Scarlet
Stitches used:
Chain (Ch) & Slip Stitch (SS)
Single Crochet (SC)
Double Crochet (DC)
Bobble Shell Cluster
Back Post Double Crochet (BPDC)
Treble Crochet (TC)
Body (I hook)
Row 1: Chain 44
Row 2: Double Crochet in third chain from hook. DC in every chain across (42 DC)
Make 12 more rows of Double crochet.You will have a rectangle that measures approximately:
Fold rectangle in half and slip stitch along top to create a hood. Cut and fasten off.
Face Edging
Single crochet around vertical edge only. Turn work and do bobble-shell edging on wrong side.
I used this great tutorial from Attic24 to create the edging. In case the link doesn’t work, here is the directions. Her directions are in Aus/UK terms so here is the US version:
Row 2 of edging :: Chain 3, then 1 DC into the first stitch. Sl st into the next stitch.
**Into the next stitch, work a Bobble-shell cluster, as follows ::
[yarn over, insert hook through stitch, yarn over, pull loop back through stitch (three loops on hook), Yarn over and pull through two loops in hook (two loops left on hook). Yarn over, insert hook through same stitch, yarn over, pull loop back through stitch (four loops on hook). Yarn over and pull through all four loops].
Sl st into next stitch.**
Repeat between ** until you reach the end of the row and fasten off.

Bottom Edge (with I hook)
Row 1: Attach yarn with right side facing you. Chain 3. Double crochet into same stitch. **Back-Post DC in the next two stitches. DC in the next two stitches.* Repeat from ** to end of row. Turn
(This row makes a waffle texture through which the drawstring can easily be woven, as pictured below)

Row 2: Chain 4. TC in same stitch. **TC in next stitch. 2 TC (increase) in next stitch.* Repeat from ** to end of row. Chain 4 and slip stitch to last stitch. Fasten off.
Drawstring: You may use a ribbon or make an long chain with the H hook to weave through the DC/BPDC row as pictured . This helps the hood conform to child’s head. Do not tie too tightly!


If you make it please share pictures on instagram – @craftyveganmommy_aletha and feel free to comment or message me with questions.
Printer Friendly PDF – Little Red Hood CVM2018

